
· by Michael Blair, Nashville's Drywall Repair
Every house has a few outside corners that take a beating: the one at the end of the hall where the vacuum turns, the edge by the garage door where groceries come in, the stair wall that furniture scrapes on moving day. Under the paint on each of those corners is a strip of bead, usually metal, that gives the edge its shape. When it cracks along the side, dents in, or chips down to bare metal, a dab of spackle rarely holds, because the bead is the part that failed. Re-setting it is a regular part of our drywall repair work, and this is what goes into doing it so it stays fixed.
What corner bead is and why the corner fails first
Drywall panels meet at an outside corner with their cut or paper edges exposed. Corner bead covers that seam: an angled strip of metal, or metal with a paper face, that is fastened or bedded over the corner and then buried in joint compound so the edge reads as one clean line. The bead sets the shape. The compound over it is what you see.
That arrangement fails in two ways. The first is impact. A corner sticks out into traffic, and a bump that would leave a scuff on a flat wall lands on a single narrow edge. A USG/CGC construction handbook lists impact on the bead as one cause of cracks along the edges of corner bead. A hard knock can also bend the metal itself, and once it is creased the compound on top has nothing straight to sit on.
The second is movement. The same handbook says the conditions that crack the edges of joint tape can crack the edges of bead, and it names lumber shrinkage as a cause of nail pops. New framing loses moisture after a house is closed in, and a bead nailed to that framing gets pulled along with it. Middle Tennessee adds its own swing: humid summers with the air conditioning running, then cold winters with the furnace drying the house out. Wood and board both move a little with each season, and a corner is where two planes of that movement meet.
Reading the damage on your corner
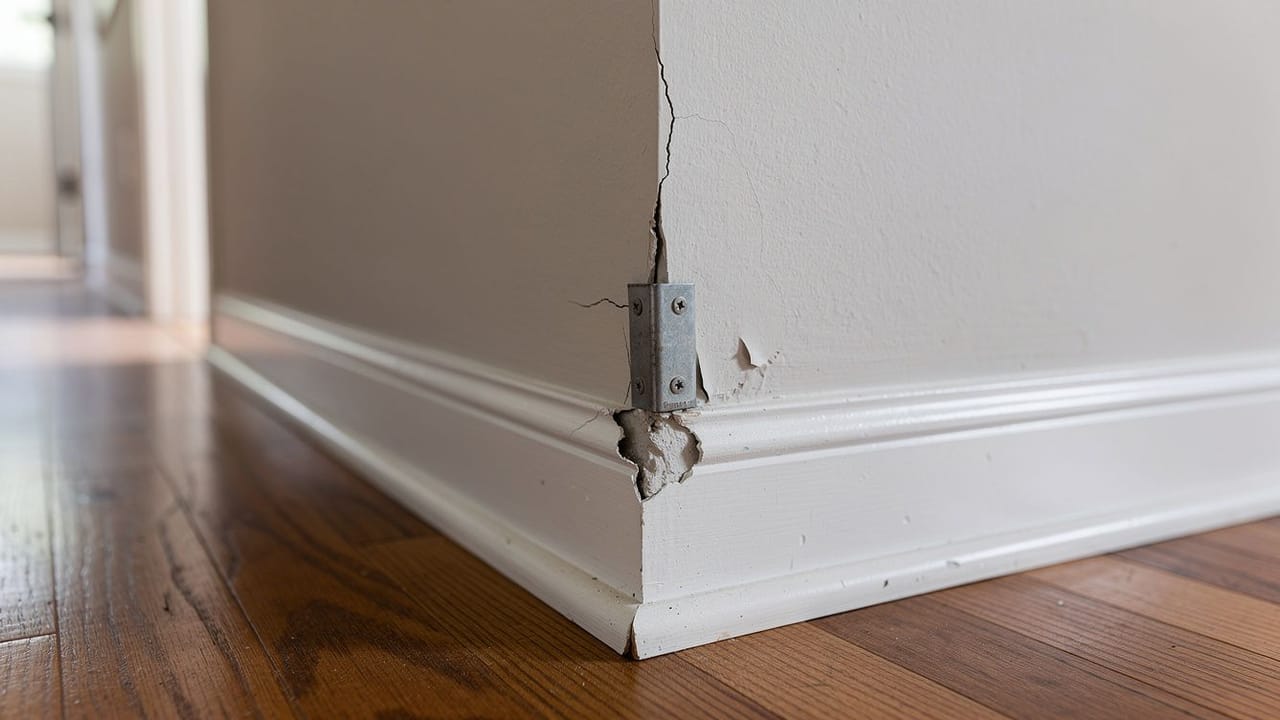
What the corner looks like tells us most of what is going on behind it. A thin crack running straight up the side of the corner, just back from the edge, usually means the compound has let go of the bead flange or the bead has shifted under it. A crack that comes back after it has been patched points to a bead that is loose or still moving, which is the same story as nail pops and seam cracks on a flat wall, just on an edge.
A dent or a flattened spot is impact damage. If the nose of the corner is pushed in, the metal is bent, and filling the dent with compound leaves a thick soft patch over a bent strip that the next bump will knock loose. A chip that shows bare metal, or a piece of compound that has fallen off and left the bead exposed, means the bond between the two has failed over that stretch, often because the bead was not fully bedded when it went in.
In a house with framing that is only a year or two old, cracks at several corners can be the framing settling in, and it is worth waiting until the house has been through a heating season before the corners are re-done. In an older house, a single damaged corner is almost always a local problem: something hit it, or a short section was never fastened or bedded well.
How the corner is rebuilt
A lasting repair starts by taking the corner back to the bead. The CGC handbook’s remedy for cracks along a bead is to remove the applied compound, securely fasten the bead to the framing beneath the panels, and refinish with joint compound. That is the right fix for a nail-on bead that has worked loose and is otherwise straight. Where the metal is bent or crushed, we cut out that section and set a new piece, because a creased bead cannot be pulled back to a true line.
For the replacement we often use a paper-faced bead. USG describes its paper faced metal corner bead as resisting edge cracking and chipping and says the paper adheres easily to joint compounds, textures and paints; it is sold in both tape-on and nail-on styles. USG says its flexible metal tape-on bead goes on with joint compound instead of nails, which avoids nail popping when wood framing shrinks, and that it suits corners at odd angles such as bay windows and vaulted ceilings.
The installation itself follows USG’s paper-faced bead and trim installation guide. The bead is bedded in a ready-mixed or setting-type compound, pressed in with the knife at about a 45-degree angle, and the excess is wiped out from under the paper so no air bubbles are left. The second coat goes on with a 6-inch knife and is feathered about 5 to 6 inches out from the nose on each side; the finish coat goes on with an 8-inch or wider knife and is feathered about 8 inches out. The guide says the second and finish coats should not be Durabond or taping compound. Then the corner is sanded and primed.
- Old compound removed back to the bead
- Loose bead fastened to the framing, bent bead cut out and replaced
- Bedding coat pressed in and wiped free of air pockets
- Second and finish coats feathered wide on both faces
- Sanded, primed and painted to match
Why wide coats matter, and what to ask
Feathering the coats 8 inches out on each side means a repaired corner is a band about a foot and a half wide, not a narrow stripe at the edge. That width is what makes the repair disappear. A corner patched with a 3-inch knife leaves a ridge you can see once the light comes across the wall, and on a wall with an orange peel or knockdown finish the band also has to be textured to match, which is its own skill; our texture matching page covers it. The smoothness the band is sanded to follows the same scale as the rest of the wall, which our post on drywall finish levels explains.
Before anyone starts on a corner, a few questions sort a lasting fix from a cosmetic one. Will the old compound come off, or is the plan to fill over it? Is the bead going to be re-fastened or replaced where it is bent? What bead goes back on, and is it nailed or bedded in compound? How far out will the coats be feathered, and will the patch be primed and painted to the corner, or to the nearest break in the wall? An honest answer to each tells you whether the crack will be back next winter.
Our crews work on corners across Davidson County and the surrounding towns, in older houses and newer builds alike, as covered on our Nashville drywall repair page. If you have a corner that has cracked, dented or chipped, send a photo with a request for a free estimate and we will tell you what we see.
Sources
- Gypsum Association, Gypsumation newsletter, Spring 2018 (on GA-222, Repairing Screw or Nail Pops) — The most common source of fastener pops is lumber shrinkage as new framing gives up its moisture.
- USG, Sheetrock Brand Paper Faced Metal Corner Bead — Manufacturer claims: resists edge cracking and chipping, adheres to compounds, textures and paints; tape-on and nail-on styles.
- USG, Sheetrock Brand Flexible Metal Tape-On Corner Bead — Applied with joint compound instead of nails, avoiding nail pops when framing shrinks; for corners at any angle.
- USG, Sheetrock Paper-Faced Metal Bead and Trim Installation Guide — Bedding compound, 45-degree embedding, coat widths and feathering distances, compounds not to use for second and finish coats.
- CGC (USG Canada) Construction Handbook, ch. 12, Problems, Remedies and Preventive Measures — Causes of cracks along corner bead, including impact; remedy by removing compound, fastening the bead and refinishing; lumber shrinkage and nail pops.